Most of us realize that high-quality images can go a LONG way in creating a compelling property listing that sells real estate quickly.
In many cases, the pictures you include with your property listing will be the primary selling point. These elements will catch their attention, draw them in, and ultimately cause them to say “YES” to the dream of property ownership.
If you want to capitalize on the deeply emotional thought process that leads to your next sale, getting great pictures should be one of your top priorities.
Unfortunately… getting amazing pictures ISN’T always a piece of cake. Hiring a good photographer or getting the pictures always requires time, money, or hassle.
But if you’re looking for the fastest way to get reasonably helpful and informative pictures right now, there are a few simple ways to make it happen FOR FREE, without leaving your computer.
Let’s explore our options, shall we?
1. Google Earth / Bing Maps
Both mapping services were groundbreaking when they first hit the internet in 2001 and 2005, and they’ve only continued to get more complex, sophisticated, and capable of generating stunning images of the world around us.
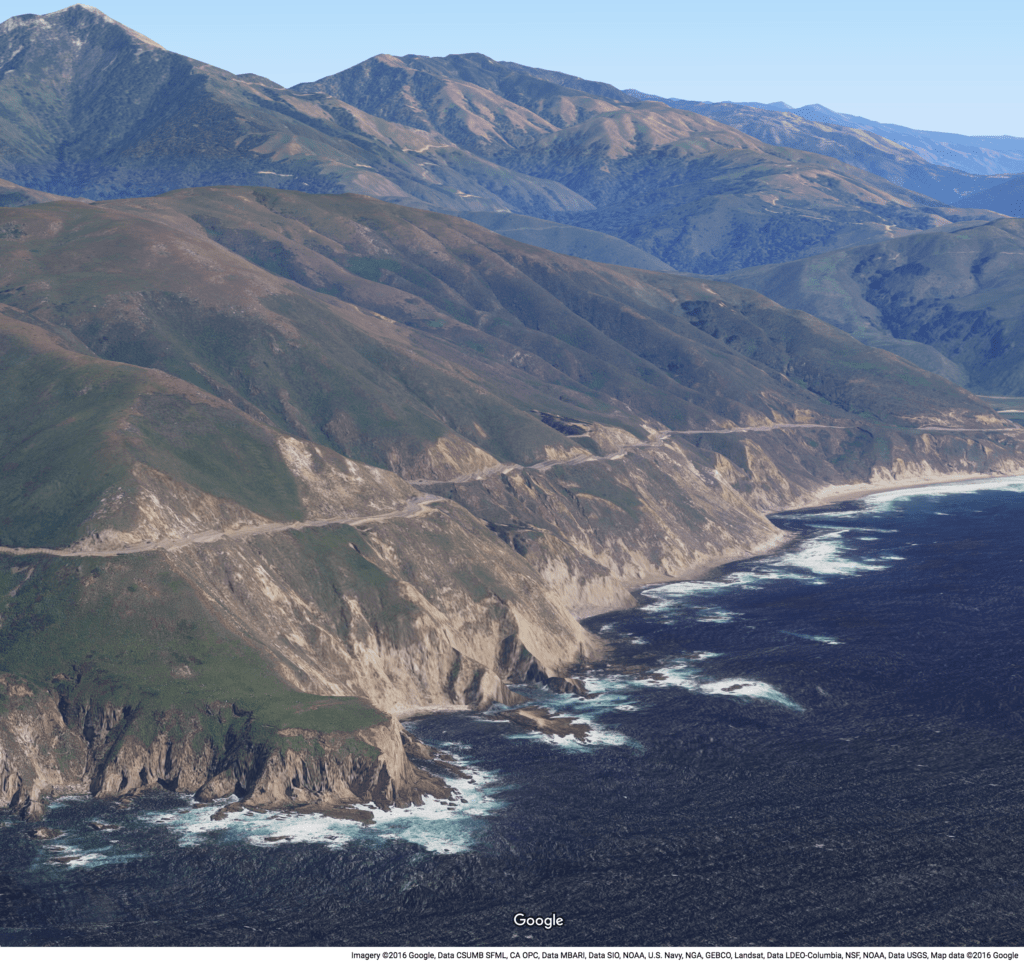
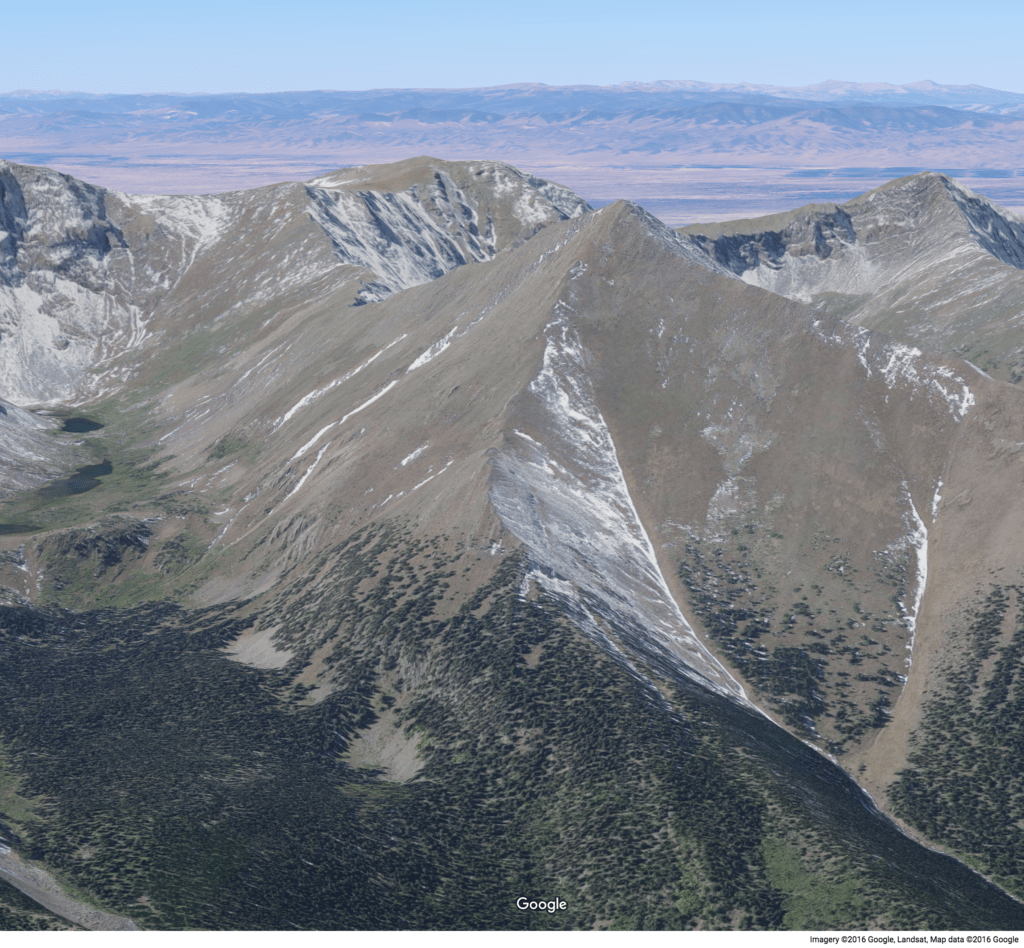
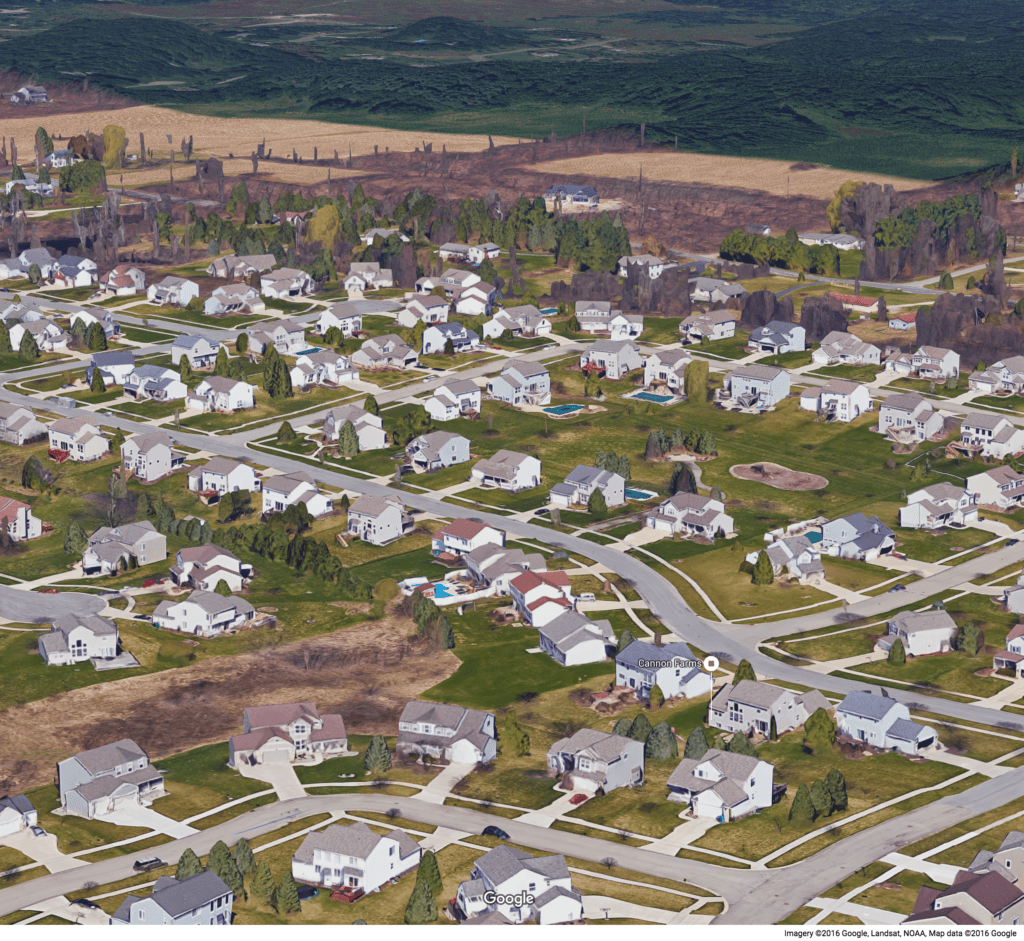
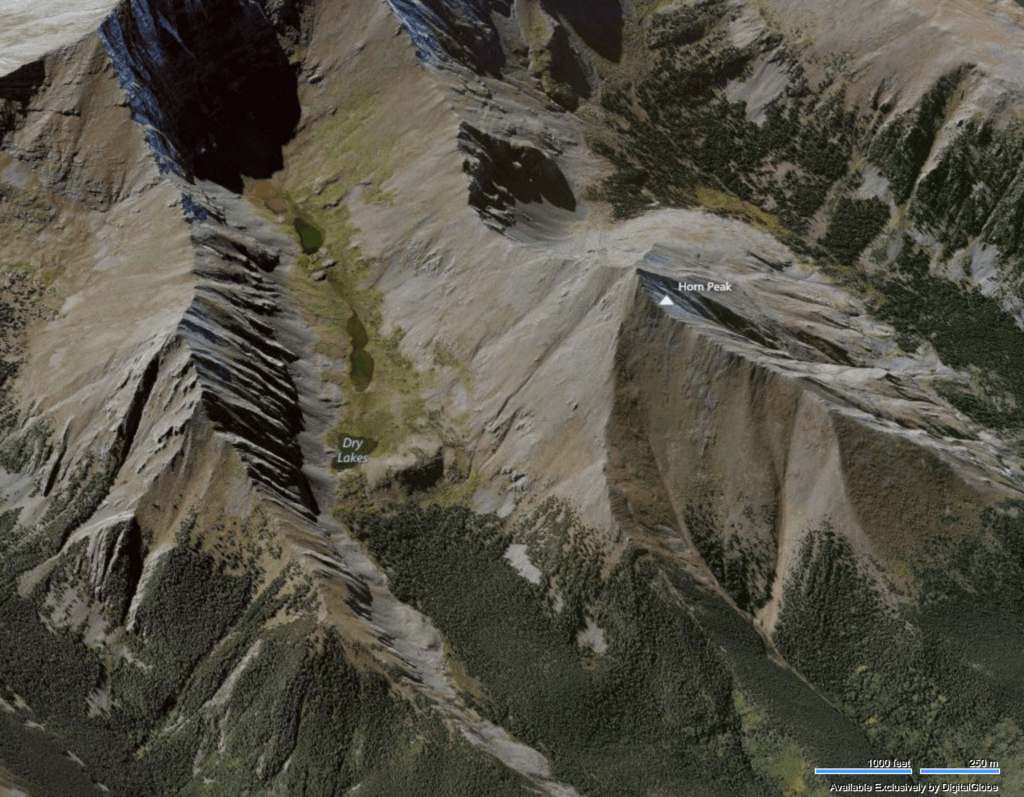
As you can see in these snapshots from Google Maps, these satellite images aren’t just helpful and informative – they can be downright gorgeous.
If you’ve got a property with ANY element of “beauty” in the surrounding area (e.g. – near a body of water, with a mountain view, or surrounded by a picturesque neighborhood), it helps to get pictures on-site. Still, even without this extra step, Google Earth and Google Maps can do much of the visual communication for you.
RELATED: 10 Google Earth Hacks Every Real Estate Investor Should Know
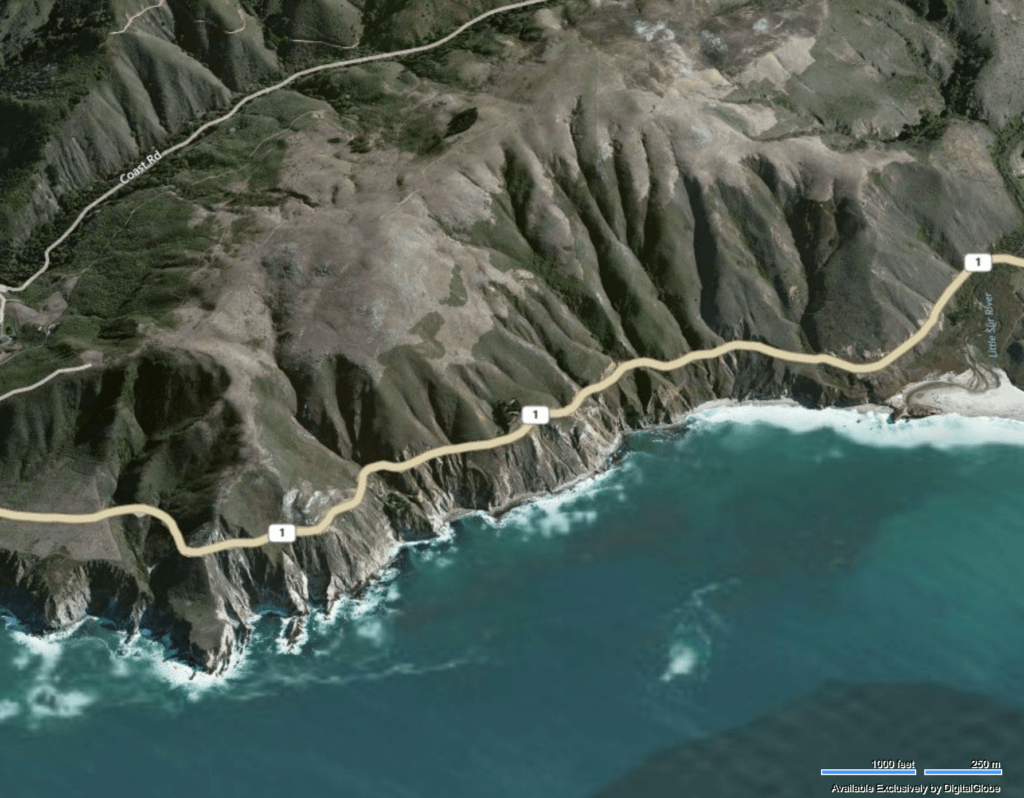
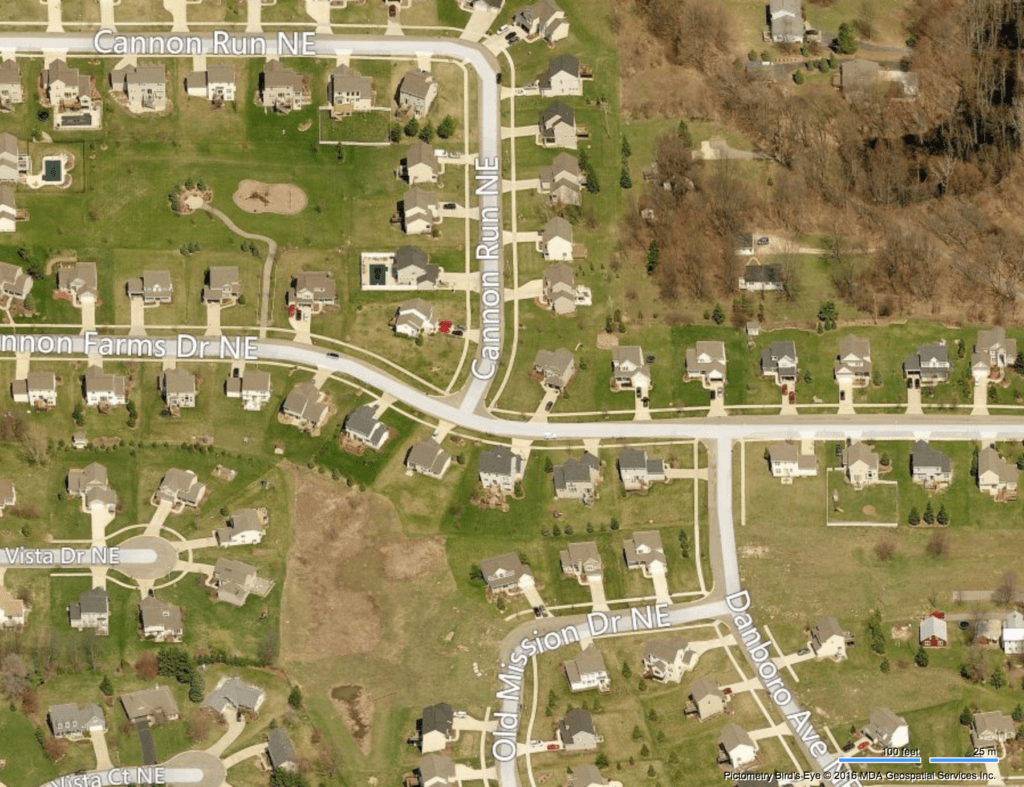
Bing Maps has a similar feature with its “Bird’s Eye” view (available in many but not all areas). Let’s look at the same locations pictured above with this alternative view.
As you can see, the pictures are still pretty good, but the “Bird’s Eye” view is a bit more limited in that it can only look at the landscape in a North/South/East/West position, and it can only look down from an (approx) 45-degree angle. While it is an actual photo of the Earth, it often lacks the viewing flexibility you can get with Google Earth and Google Maps.
I think Google Earth or Bing Maps could be used in a property listing, but the best option usually depends on the property itself. When you start putting these free tools to work, you’ll find that sometimes a property looks more flattering with the image database of one vs. the other, and sometimes they can both be used to show different perspectives.
Another useful tool for property listings is Land id's My Maps feature, which allows you to point out specific features, images, videos, and other attributes on your property.
How to Take Screenshots
Now you might be wondering…
“How do I save these images to my computer and use them in my listing?”
It's pretty simple! Here's how it works…
For PC (Windows) users, you can grab these screenshots by clicking on the “Start” menu and searching for the “Snipping Tool” on your system (a free piece of software that comes with Windows). Once you open it, you'll see how shockingly easy it is to generate images of almost anything (especially when you're getting images from an online mapping service). Check it out…
For Mac users, click “Command+Shift+4” and your mouse will change into a crosshair, which allows you to draw a box over your desired image. The image will appear on your desktop when you release your mouse button. Here's how it works…
Keep in mind, these screenshot tools can create images from ANYTHING on your screen… so if you can find a better view of your property through some other medium – have at it!

2. Google Street View
Another incredibly convenient tool (again, courtesy of Google Maps) is Google Street View. While it's not available everywhere (notably missing in some of the more rural areas), their database of road imagery is growing every day, and it can be extremely useful when the data is available by the property you're trying to sell.
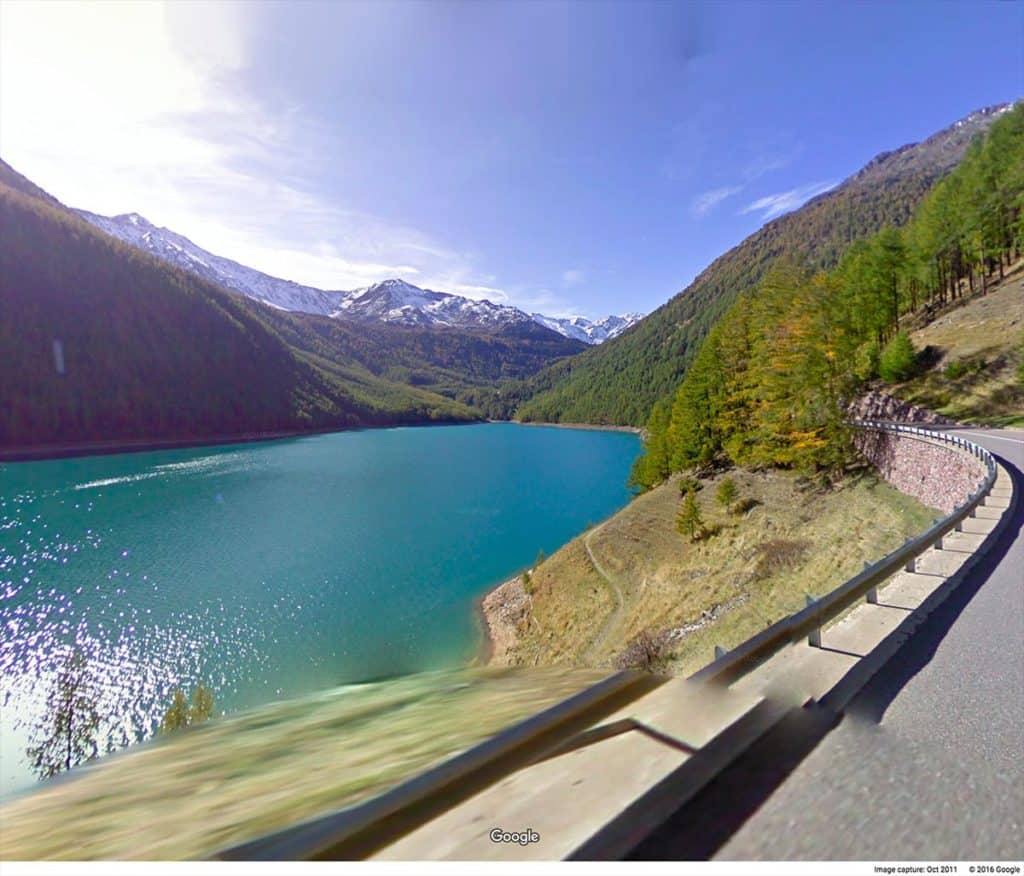
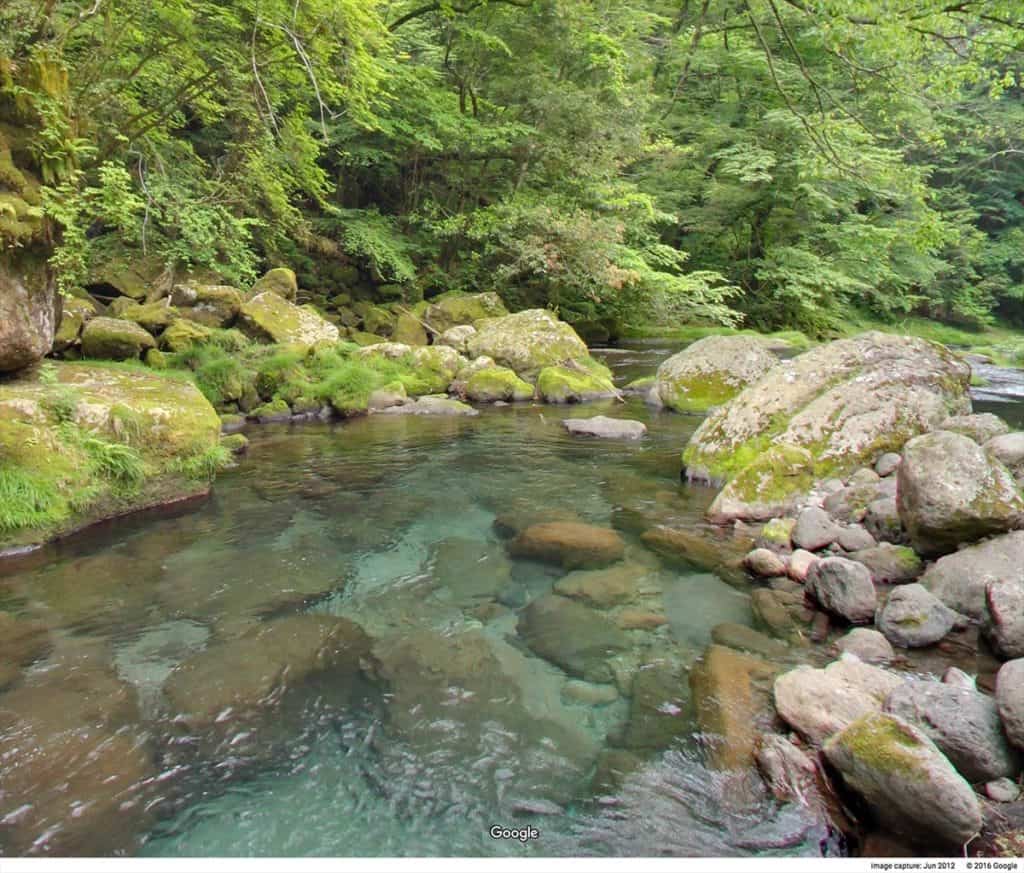
I have used this feature countless times when doing property research. The images aren't always “beautiful” per se. Still, when they look reasonably good, they can be a great fit for your property listings (especially if the images showcase the strong characteristics of the property). Here are a few examples of what's possible…
While these pictures aren't necessarily the norm (i.e., not all properties will look this good on Google Street View), these are just a few examples of what is possible if you get lucky.
And in case you're unfamiliar with how it works, this video explains the basics…
Again, Google Street View won't always produce the most flattering images of every property (so you may or may not want to use them in your listings) – but I think it's always worth investigating. Given the convenience and the FREE price tag, why not take 30 seconds and check out what's available?
3. GIS Parcel Maps
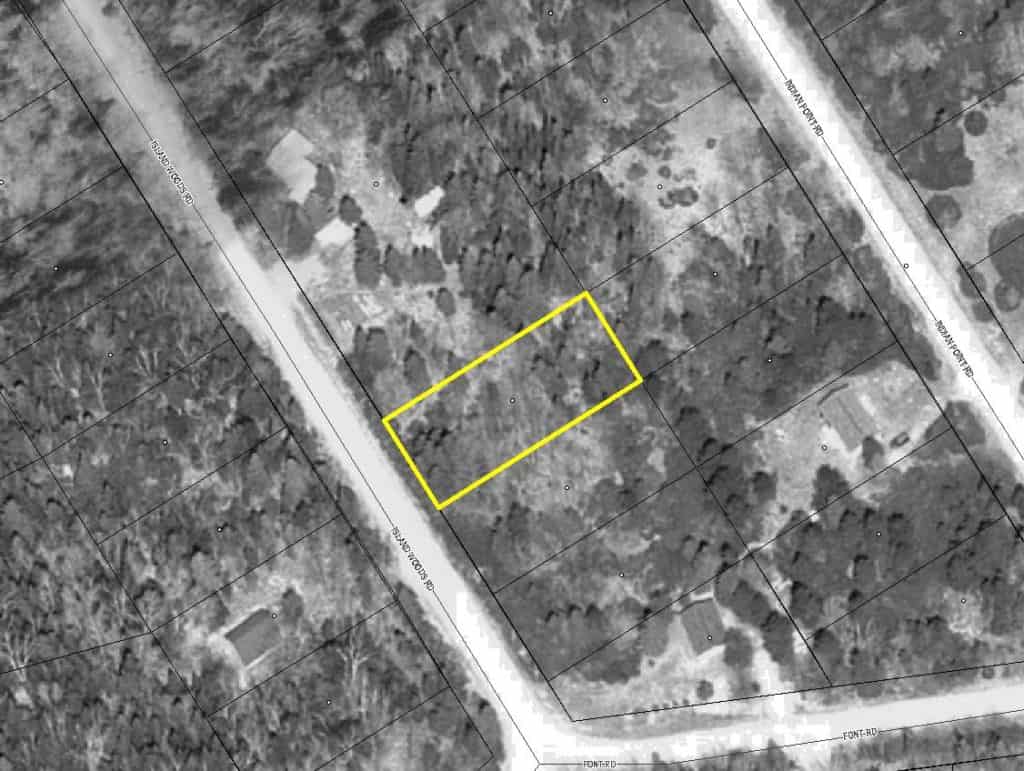
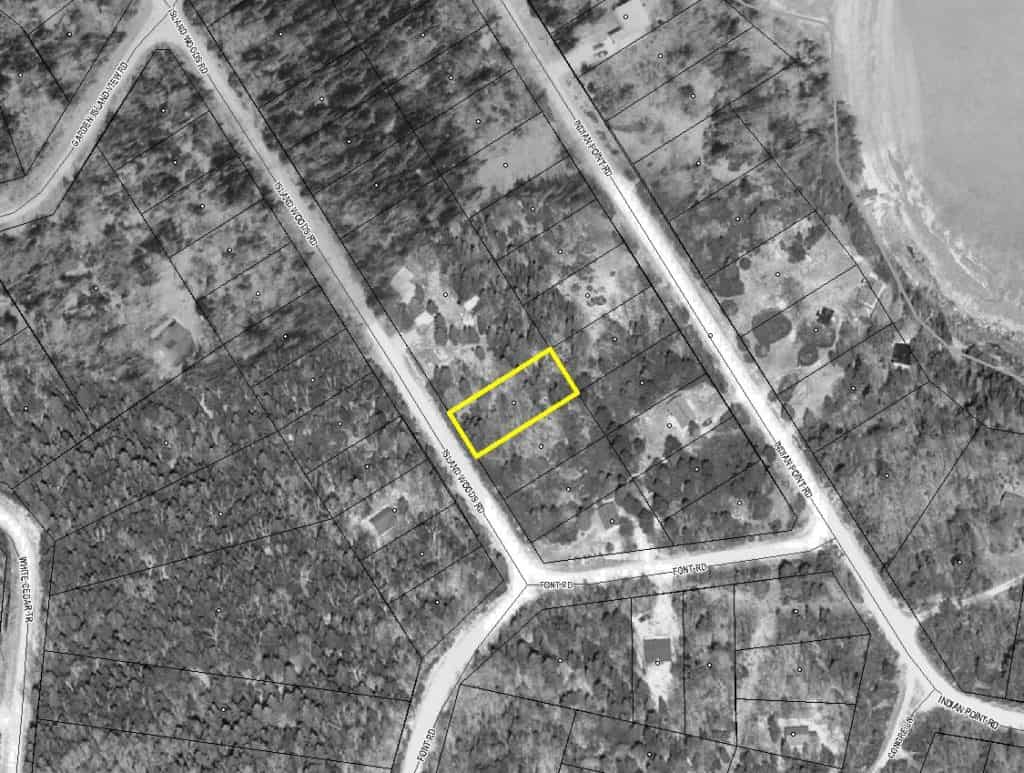
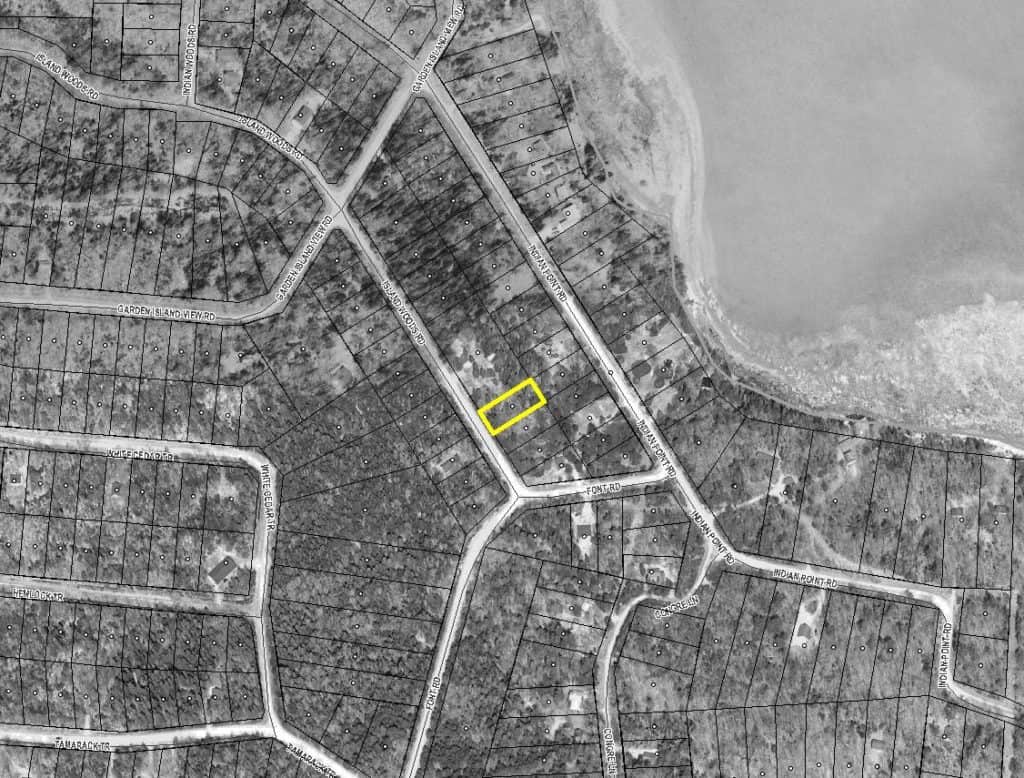
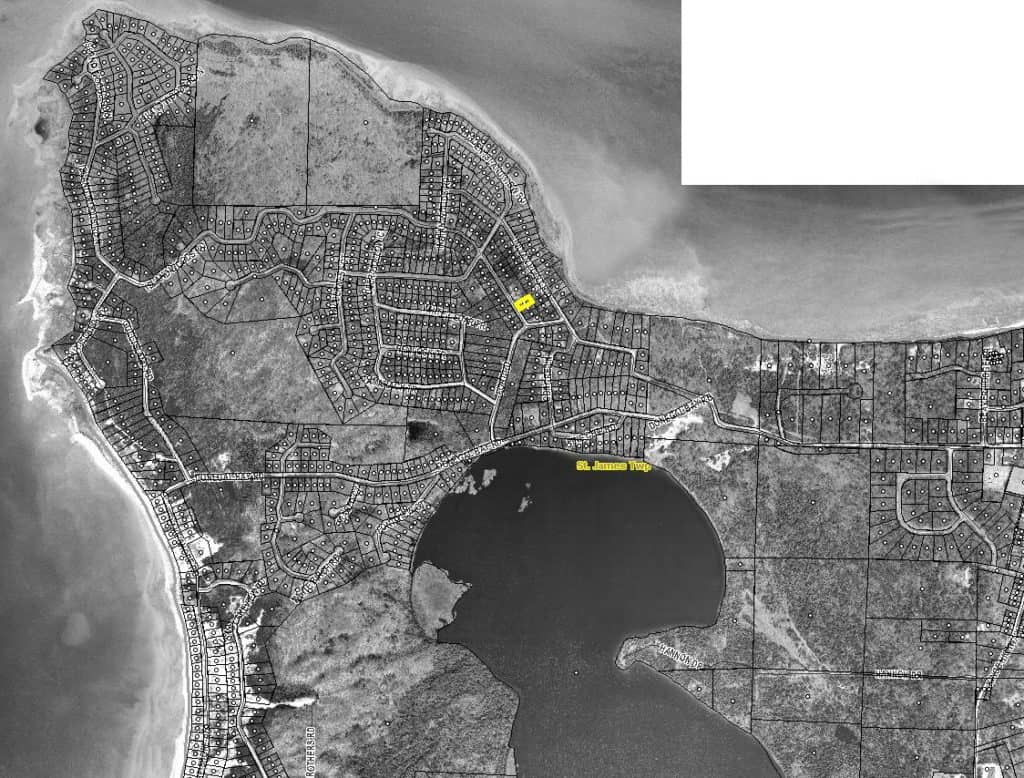
Including some parcel maps in your property listing can be extremely helpful, especially for properties that consist of vacant land or a larger tract of land with unclear boundaries.
When I generate parcel maps like this, I like to include a series of images – not only to help buyers understand the shape and size of the property but also to show them where the lot is situated relative to the surrounding area…
See what I mean? Pictures like this leave very little ambiguity about the size of a property and where it’s located. They’re great at fully informing the buyer about the property's size, shape, dimensions, and location (precisely what we want).
How can you get these parcel maps? There are a few ways, but the most common methods I use are:
- My data service of choice (DataTree and/or PropStream)
- A paid subscription service like Parlay and/or Land id
- County GIS Mapping Systems
While a data service like DataTree or PropStream is usually the most convenient and inexpensive way to find these parcel maps, it isn’t always equipped with the data you’ll need. Some counties don’t make this information available to third-party data providers, which means you won’t be able to find it in their system either.
A data service also isn’t free, so if you can’t find what you need here or if you’re just vehemently opposed to paying for anything, your next option is to go directly to the county’s GIS mapping system (assuming they have one) and generate your screenshots that way.
Another creative way to use these parcel maps is to create a 3D polygon in Google Earth and take screenshots of the image for your property listings. I'll show you how this works in this video…
And keep in mind, you can also save the polygon as a kmz file and share it with others, so they can also see the same polygon on their own computers.
You may find that the county’s system can provide even better information and images than a third-party data service can. In most cases, it’s not a bad idea to always check out the county’s GIS system even if you don’t end up using their information. This way, you’ll be fully equipped with the best images and parcel maps.
RELATED: Finding the Size, Shape, Location, and Dimensions of Your Property
Keep in mind, some county GIS mapping systems can be very confusing to figure out, so if you get stuck, that’s okay. Just go slow and give yourself some time to learn and navigate the system (and don’t be afraid to call the county for help if you can’t figure it out).
There are ALL KINDS of different GIS mapping systems – with different layouts, navigation menus, controls, etc. I can't give you one tutorial that will teach you everything. Still, this video gives an example of how to use one GIS mapping system (and chances are, if you can figure out one of them, you'll be able to find your way through most of them).
4. Google Image Search
Google has an awesome tool that allows users to search specifically for images.
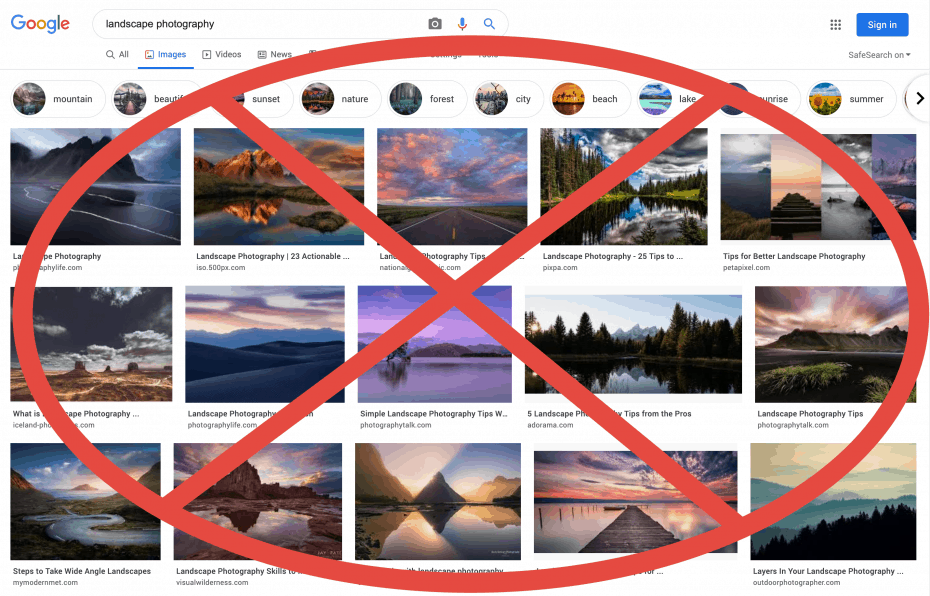
It’s an incredibly convenient way to find pictures of a property’s surrounding area, but you don't want to just take the first picture you find and use it in your listing.
Many of these images are copyrighted by their owners. If you just take whatever you want, you can open yourself up to some serious liability if the image owner finds out and they aren’t okay with you using it.
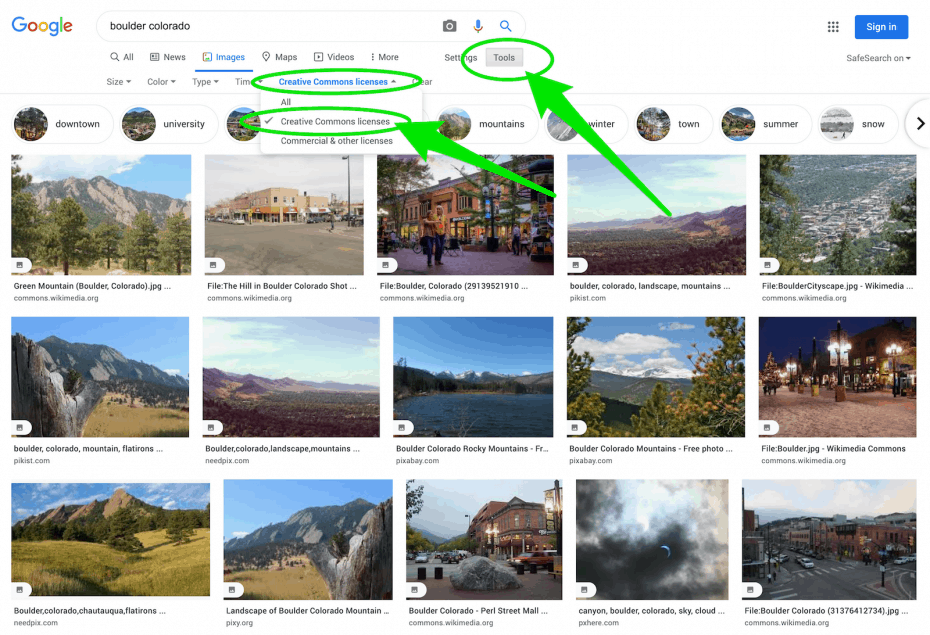
Luckily, Google also has great functionality in its image search that allows you to filter pictures based on their usage rights.
For example, let’s say I want to find some pictures of Boulder, Colorado (because I’m selling a property a few miles away from the city, and I want to show pictures of the nearby attractions). I could do an image search for “Boulder Colorado” and then (VERY IMPORTANT) click on Tools > Usage Rights > Creative Commons licenses.
This will eliminate most of the copyrighted or protected images you shouldn’t be using and show some of the safer options you can actually feel free to work with.
Many of these images will fall under “Public Domain” (which means they’re free for anyone to use without permission), and many of them will fall under a “Creative Commons” license (which are free to use with the proper attribution given to the owner).
Image Attribution
Whenever you're pulling pictures off the internet for your property listings, there may be some additional steps to go through to give proper credit to whoever/wherever you obtained the pictures from.
Public Domain vs. Creative Commons
Regarding the images on Google labeled for reuse, there are a few different levels of “freedom” to consider.


Since it's not always easy to follow the proper attribution procedure with images that have a Creative Commons license, I usually try to steer clear of any issues and just use images from the Public Domain images (because most listing sites won't necessarily give me the freedom to include the property attributions when necessary).
Google Earth and Bing Maps
If you're going to pull images from Google Maps, Google Earth, Google Street View, or Bing Maps, you'll need to give credit to the services and data companies making these images available.
Also, note that if you're going to use these images for “commercial purposes”, you'll need to make sure you're using Google Earth Pro (which at the time of this writing, is free to download) and/or that you're getting Google's permission to use them in this way. You can read more about Google's attribution guidelines here.
This page explains very clearly how to properly attribute any images from Google Earth or Google Maps, and this page explains very unclearly how to properly attribute any image taken from Bing Maps.
I'll be honest, I couldn't find any direct guidance about how to properly cite Bing Maps images (it was probably covered somewhere in this 18,000+ word novel, but I couldn't find it in plain English). When I use these images, my best attempt is to follow the same procedures required by Google (note: if I ever receive any legal notices from Microsoft, I'll be sure to update this blog post).
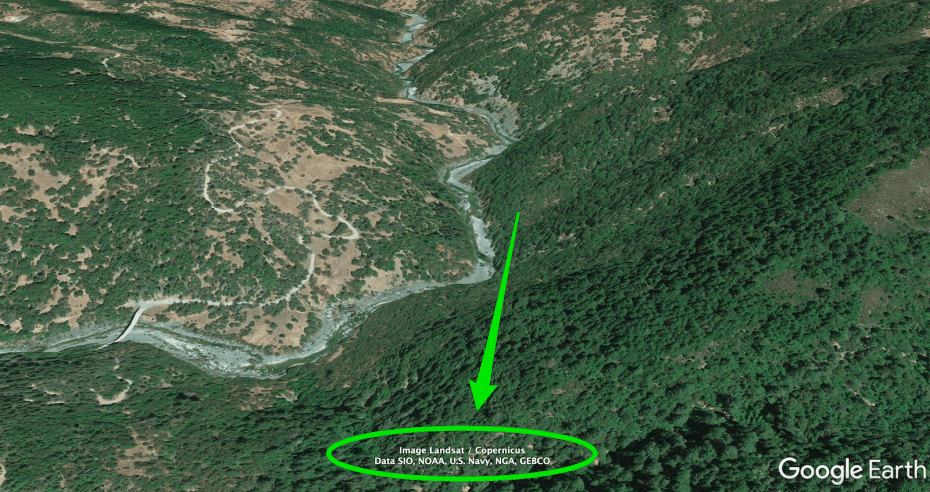
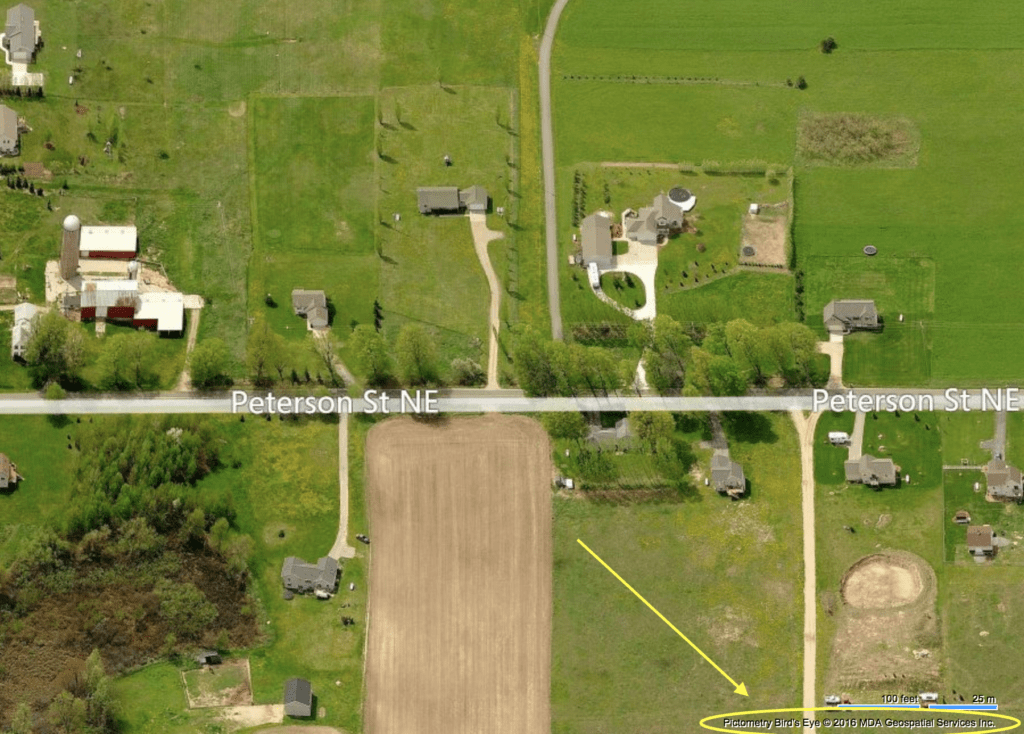
To cover the attribution with Google Maps, the general rule is to include the name of the service and the relevant data provider (ex. “Google, DigitalGlobe”) either directly beneath the image or within the image itself.
Luckily, this isn't hard to do. Both names will always be included near the bottom of the map – like this in Google Earth…
And like this in Bing Maps…
Make sure these attributions are legible and included in the picture (or be sure to manually put them in the images or type them below the picture itself), and you should be all set.
And lastly, of course, keep in mind that none of this should be considered a viable substitute for legal advice. I’m not an attorney, so don’t take my word for it. Talk with your legal professional if you have any doubts about using these images and/or attributing them correctly.

